Skip to content
(802) 297-7727‬ Contact
ISG Development

ISG Development

Website Solutions • Software Development • IT Consulting

  • Websites
  • Development
  • Consulting

Outlook Setup

Posted on May 14, 2025June 22, 2025 by Ian

This guide will walk you through the steps to setup your IMAP email account for Outlook on your Windows computer.

1. Click on the Start Menu or press the Window (⊞) key and then search for the Control Panel.

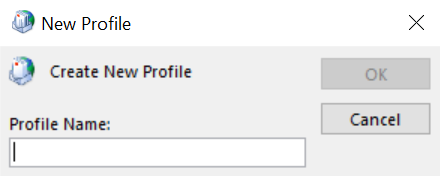
2. Once in the Control Panel, change the View by in the upper right corner to Small Icons.

3. Click on Mail.

4. Once in the Mail Control Panel, select Show Profiles

5. Select Add to add a new profile and enter a name to help your identify the profile in the even you have multiple profiles, and then press Ok

6. Select Manual setup or additional server types and then click Next

7. Select POP or IMAP and click Next

8. In the Add New Account window, enter the following information:

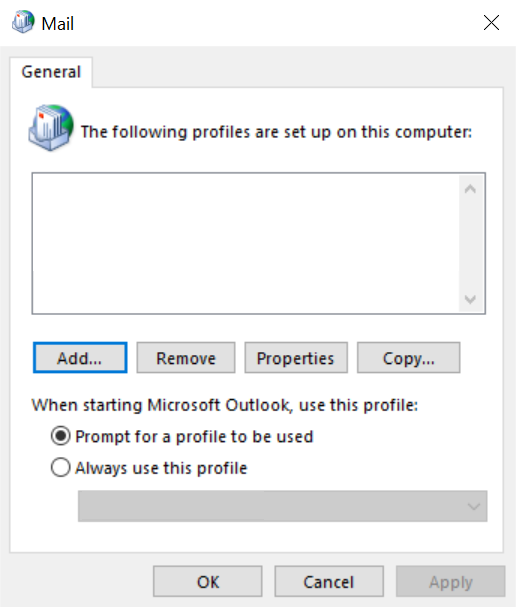
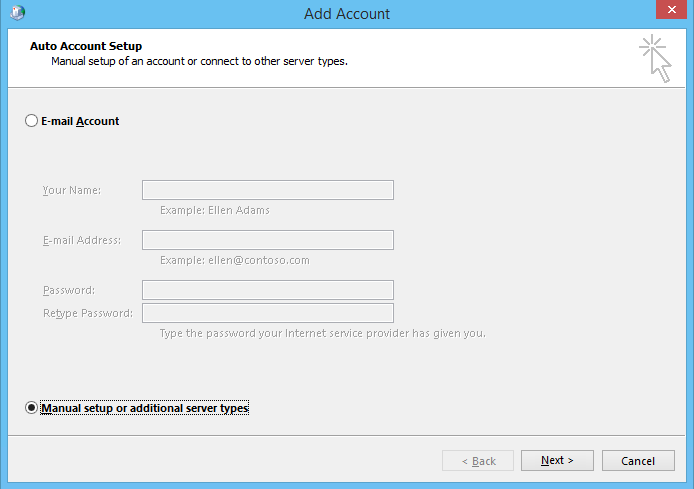
  • Your Name — Enter your first and last name
  • Email Address — Enter your email address
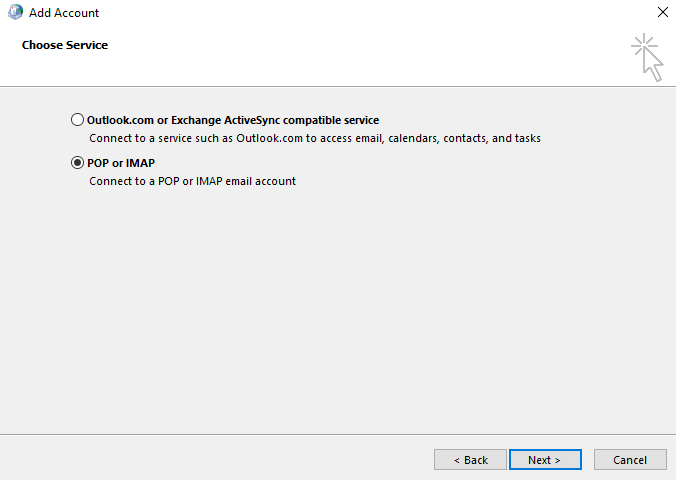
  • Account Type — Select IMAP
  • Incoming Mail Server — Enter secure.emailsrvr.com
  • Outgoing Mail Server (SMTP) — Enter secure.emailsrvr.com
  • User Name — Enter your email address
  • Password — Enter your account password
  • Check the Remember Password box so you don’t have to enter it each time you use your email
  • Do not click Next yet; there is more to be set
Please note the incoming and outgoing mail servers both need to be set, and the host name to be used contains the words “email server” without the “e” characters in the word “server”.
9. Click on More Settings and then click on the Outgoing Server tab and set the following:

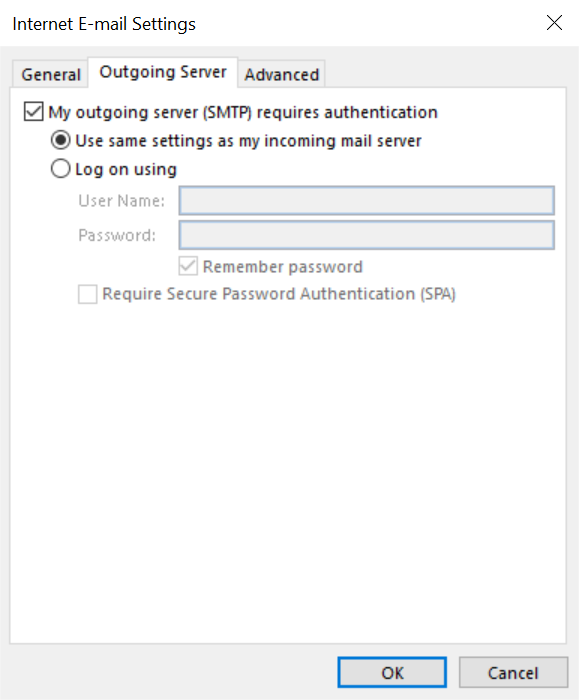
  • Check the My outgoing server (SMTP) requires authentication box
  • Check the User the same settings as my incoming mail server option
  • Do not click Ok yet; there is more to be se!t
10. Click on the Advanced tab at the top of the windows and set the following in this order:

  • FIRST, set the “Use the following type of encrypted connection to SSL under both the Incoming server (IMAP) and the Outgoing server (SMTP) items
  • THEN set the Incoming server (IMAP) port to 993
  • AND set the Outgoing server (SMTP) port to 465

Now you can click Ok

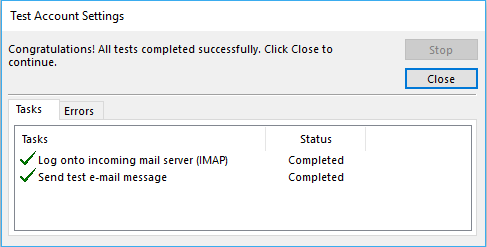
11. You should be returned to the Add Account page and can now click Next\

12. Outlook will test your account, including attempting to send a messages using the settings you just entered.

Your email should now be all set up. It may take a few minutes for your emails to sync.
Posted in Windows Email Setup GuidesTagged Account, Email, Email Client, Microsoft, Office, Outlook, Setup, Windows
  • ISG Development

    Driven by innovation and grounded in expertise, ISG Development helps businesses navigate digital transformation with smart, scalable web and software solutions.
  • Find Us Online

  • Services

    • Website Solutions
    • Domain Names
    • Software Development
    • Open Source Projects
    • IT Consulting
  • Resources

    • Help Center
    • Getting Started Guide
    • Frequently Asked Questions
    • Webmail Login
    • Legal Center
  • Company

    • About ISG Development
    • Why Choose ISG Development
    • Sales Inquiry
    • Privacy Policy
    • Terms of Use
  • Copyright © 2025 ISG Development, LLC. All Rights Reserved.
    Home | Privacy | Legal