This guide will walk you through the steps to setup your IMAP email account for Thunderbird on your computer.
1. Open Thunderbird on your computer.
When Thunderbird opens, if you do not have an existing account it will start on step 3.
2. Select Tools > Account Settings and then Account Actions > Add Mail AccountIn earlier versions, you may need to select the hamburger menu (≡) icon in the top right and then select New before selecting Existing Mail Account to open the window to setup your mail account.
3. In the Setup Your Existing Email Address window input the following information: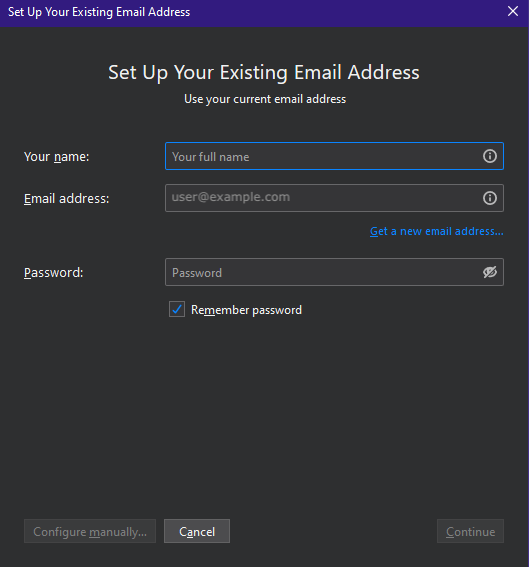
- Your Name — Enter your first and last name
- Email Address — Enter your email address
- Password — Enter your account password
- Check the Remember Password box so you don’t have to enter it each time you use your email
- do not click on Continue yet; there is more to be set!
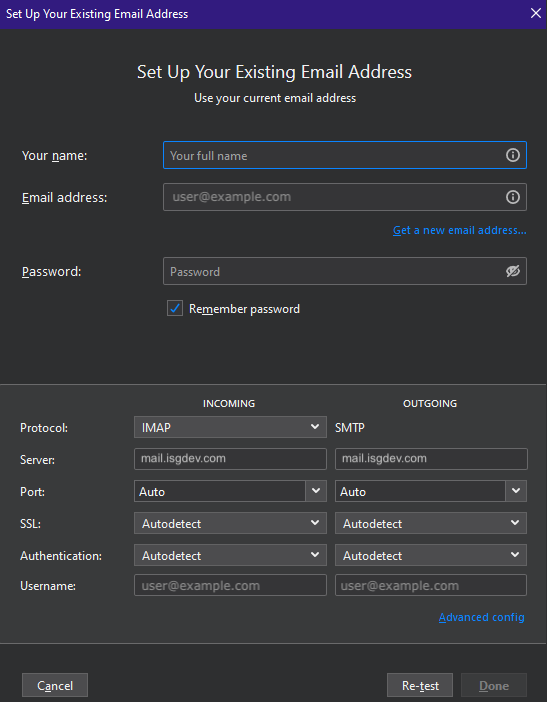
- INCOMING
- Protocol — Select IMAP
- Server — Enter mail.isgdev.com
- Port — Enter 993
- SSL — enable SSL
- Authentication — Select Normal Password
- Username — Enter your email address
- OUTGOING
- Protocol — SMTP will always be set
- Server — Enter mail.isgdev.com
- Port — Enter 465
- SSL — enable SSL
- Authentication — Select Normal Password
- Username — Enter your email address
Once this information is entered you should press the Done button