This guide will walk you through the steps to setup your IMAP email account for Windows Mail application.
1. Click on the Start Menu or press the Window (⊞) key and then search for the Mail.
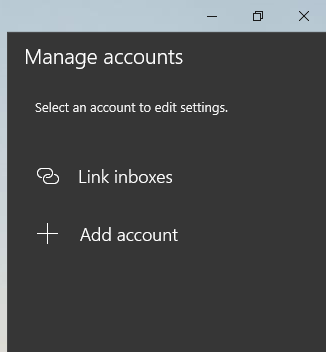
2. When Mail opens, click on Accounts at the top left.
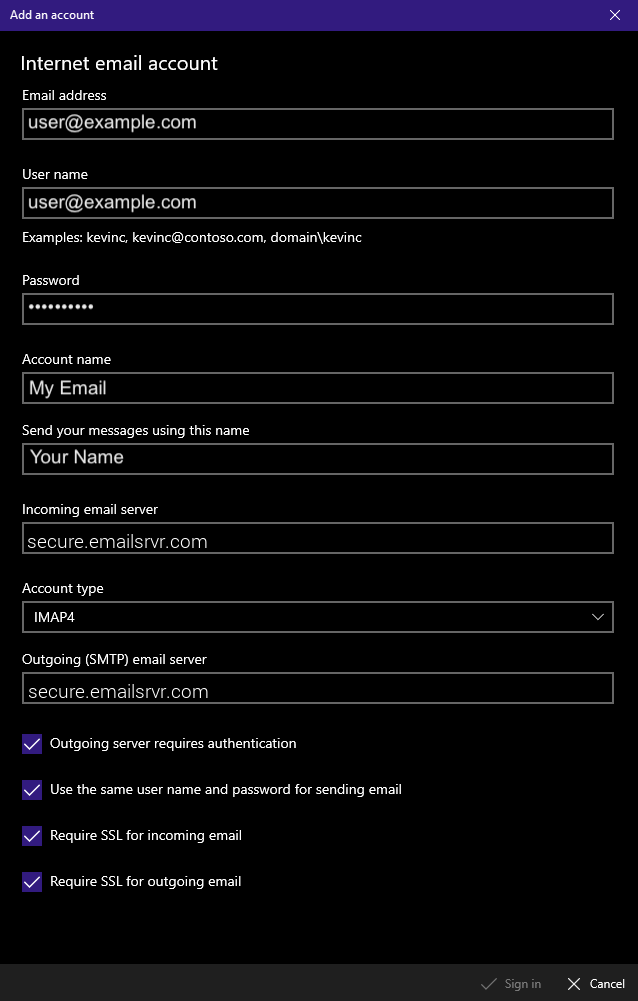
- Email address — Enter your email address
- User name — Enter your email address
- Password — Enter your account password
- Account name — Enter any value you want to name this account on your computer
- Send your messages using this name — Enter your first and last name
- Incoming Mail Server — Enter secure.emailsrvr.com
- Account Type — Select IMAP
- Outgoing Mail Server (SMTP) — Enter secure.emailsrvr.com
- Check the Outgoing server requires authentication option
- Check the Use the same user name and password for sending email option
- Check the Require SSL for incoming email option
- Check the Require SSL for outgoing email option
Click Sign In when complete.