This guide will walk you through the steps to setup your IMAP email account for Apple Mail on your MacBook.
1. Launch the Apple Mail application
If Mail is in your dock, you can click on it to launch the application. Otherwise, press Command (⌘) + Spacebar, and then type Mail into the Spotlight search. When it shows Mail.app press Enter to launch the Mail application.
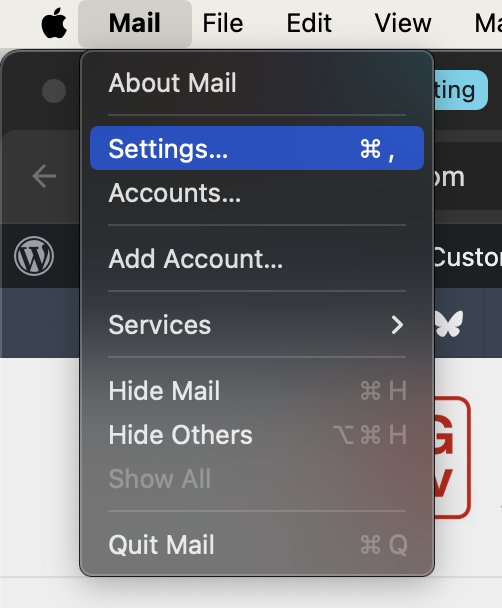
2. In the Mail app, click on Mail at the top left and then select Add Account.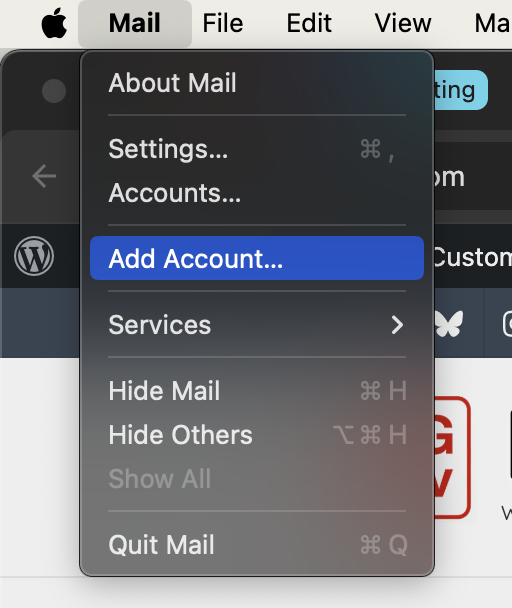
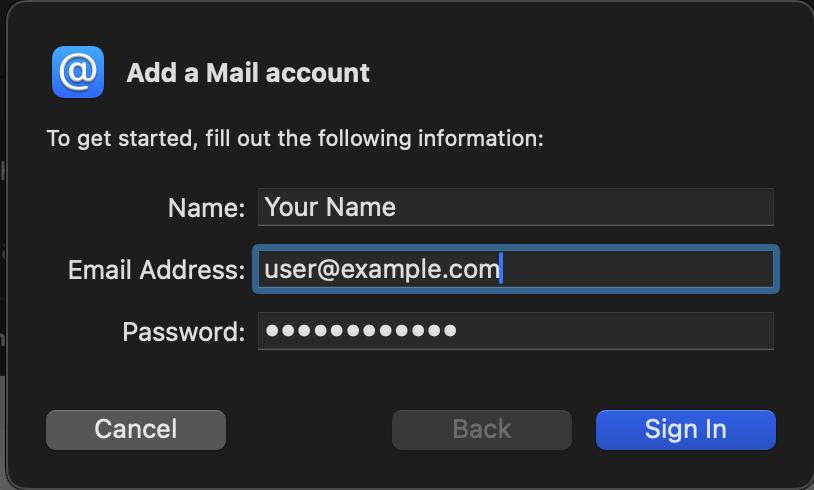
- Name — enter your first and last name
- Email Address — enter the email address for your new account
- Password — enter the password for your new account
Once this information is entered you should press the Sign In button
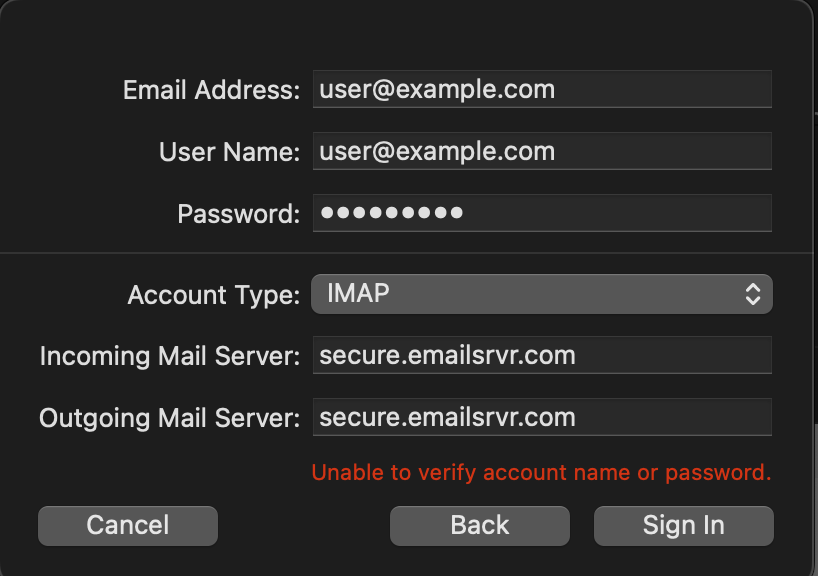
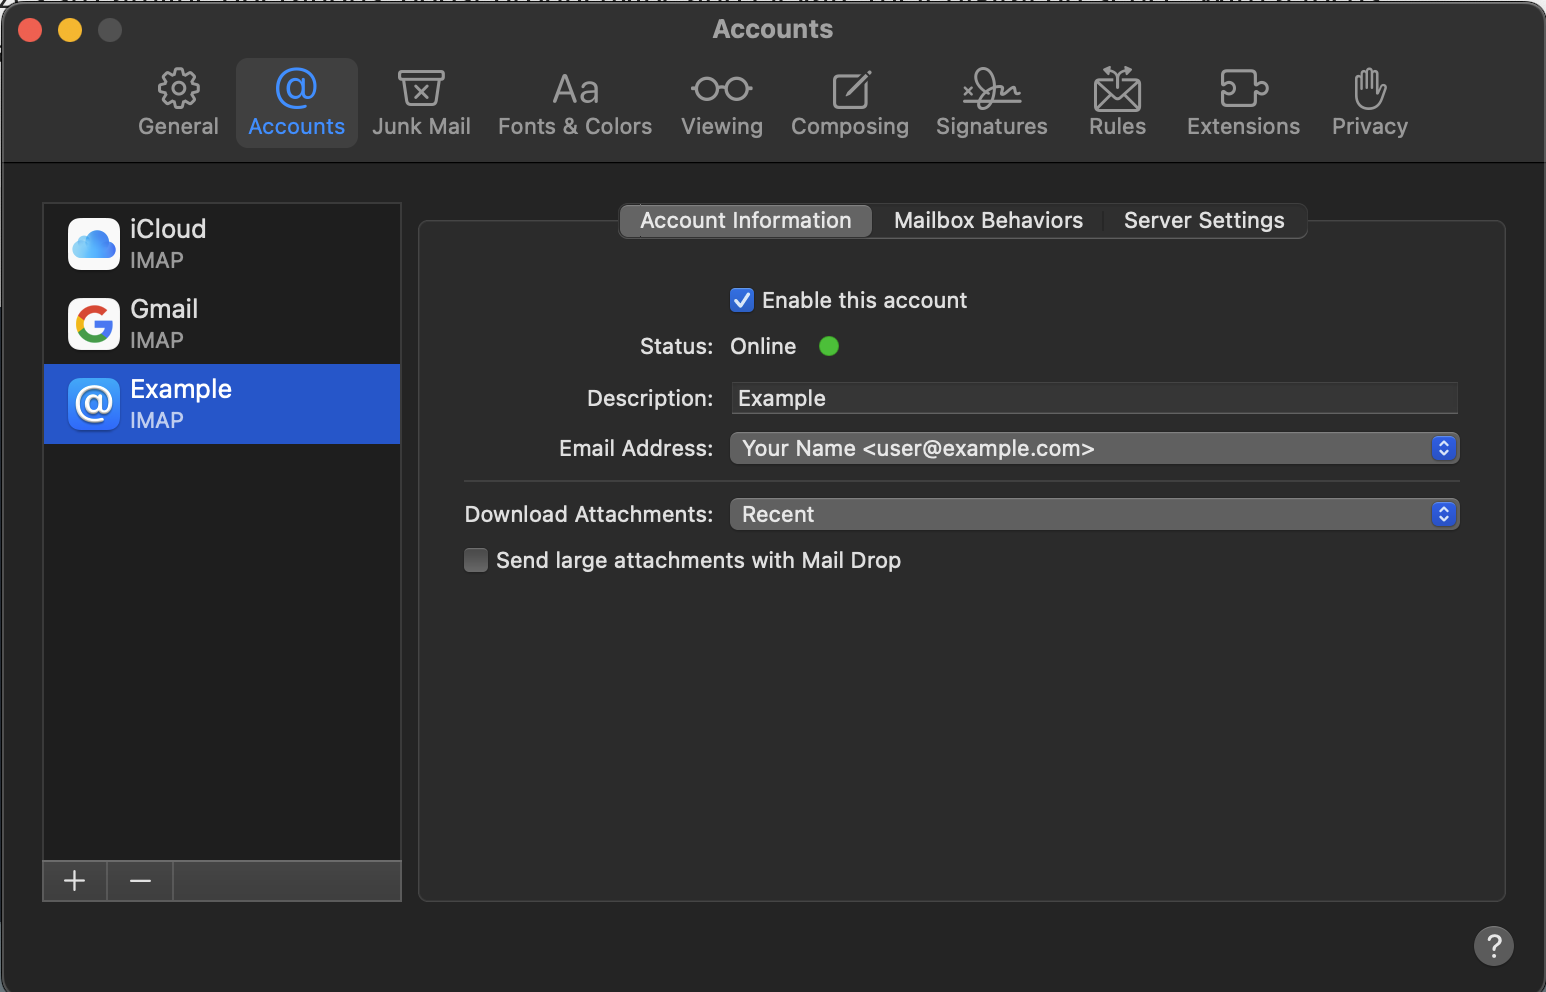
- Email Addresss — should still be set from the previous screen
- User Name — enter your email address again, which also acts as your username
- Password — should still be set from the previous screen
- Account Type — make sure IMAP is selected
- Incoming Mail Server — enter secure.emailsrvr.com
- Outgoing Mail Server — enter secure.emailsrvr.com
Once this information is entered you should press the Sign In button
6. If you get any errors at this point, you need to check the values you entered, as this indicates one of the fields is incorrect. Make sure you entered your correct email address for the user name, the correct password and the mail servers as outlined in the previous step. 7. Make sure Mail is checked, unselect Notes unless needed, and pressed the Done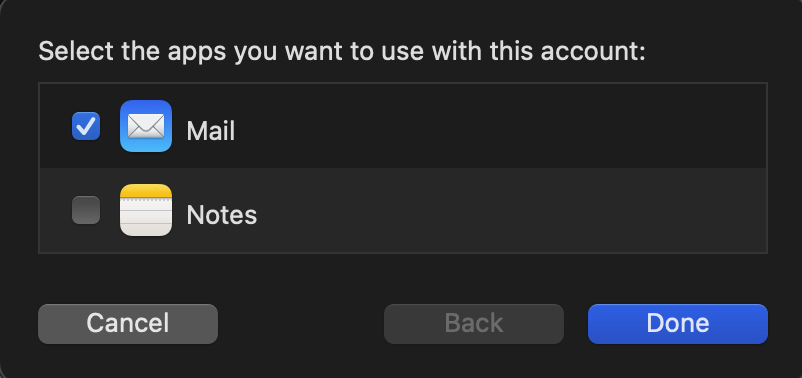
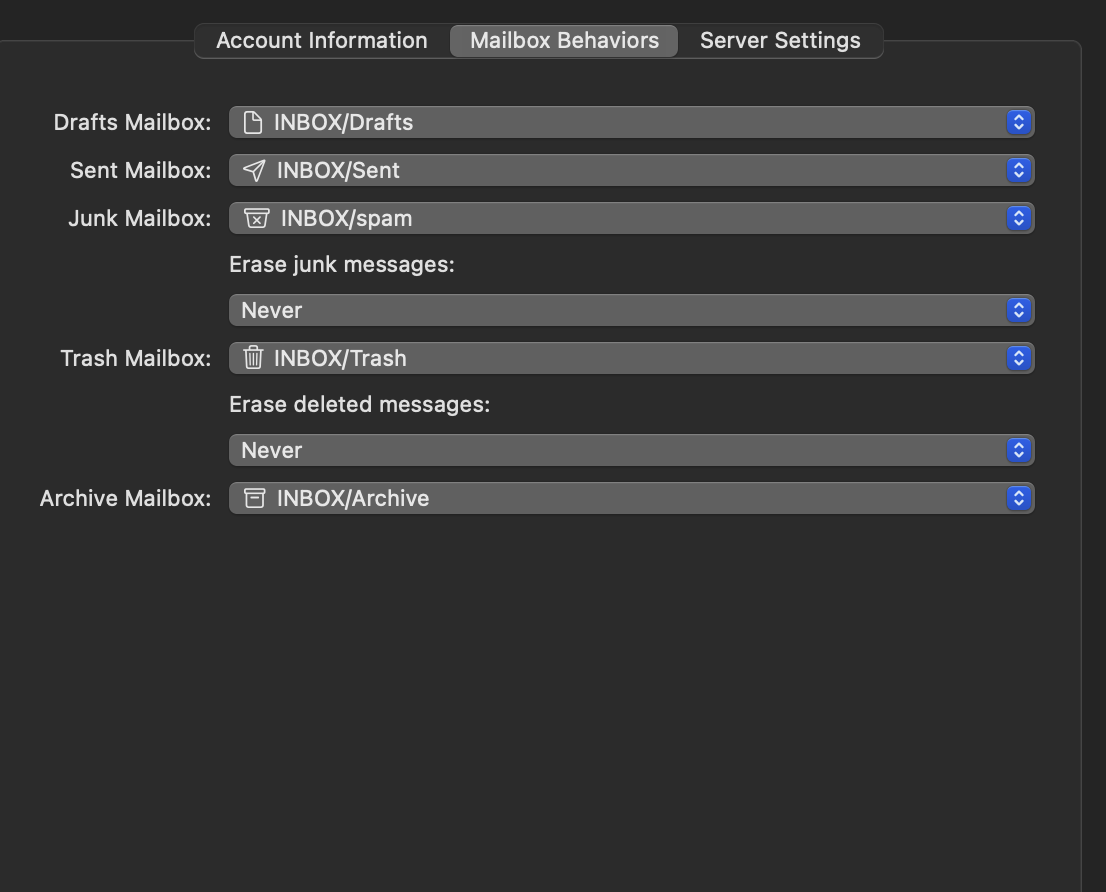
- Drafts Mailbox — select INBOX/Drafts to store any drafts you have saved on the server
- Sent Mailbox — select INBOX/Sent to store all sent emails on the server
- Junk Mailbox — select INBOX/spam to be able to access emails marked a spam by the server
- Erase junk messages — set this to your preferred setting
- Trash Mailbox — select INBOX/Trash to keep deleted emails on the server until they are permanently erased
- Erase deleted messages — set this to your preferred setting
- Archive Mailbox — select INBOX/Archive to store any archived emails on the server