This guide will walk you through the steps to setup your IMAP email account on an Apple iPhone. These instructions were based on iOS 18. If you are using a previous version of iOS installed on your device, the steps and screenshots may be slightly different. We recommend running the latest version of iOS on your device, which ensures you have the latest features and most recent security updates.
1. On the home screen, open the Settings app
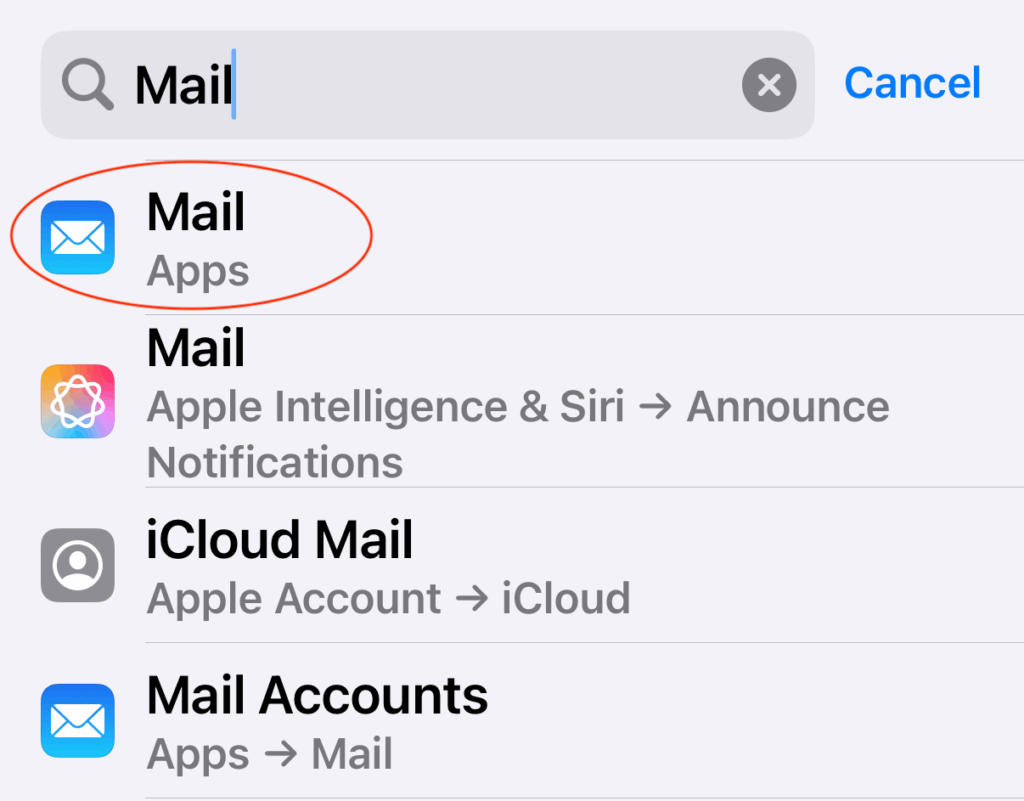
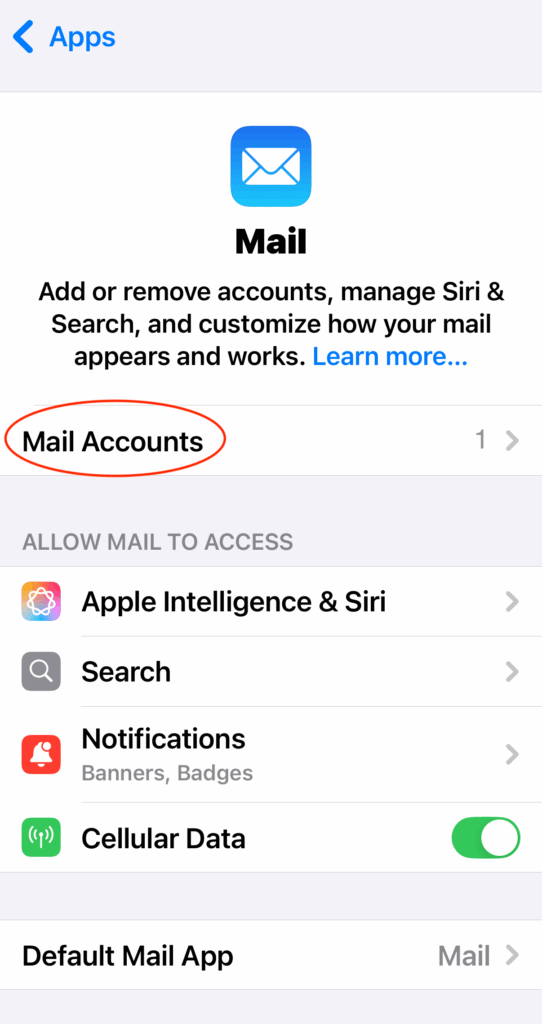
2. Go to the Mail settings using one of these methods…
- Scroll down and select Apps and then scroll down and select Mail; or
- Use the Search box at the top, type in Mail and select the Mail App.
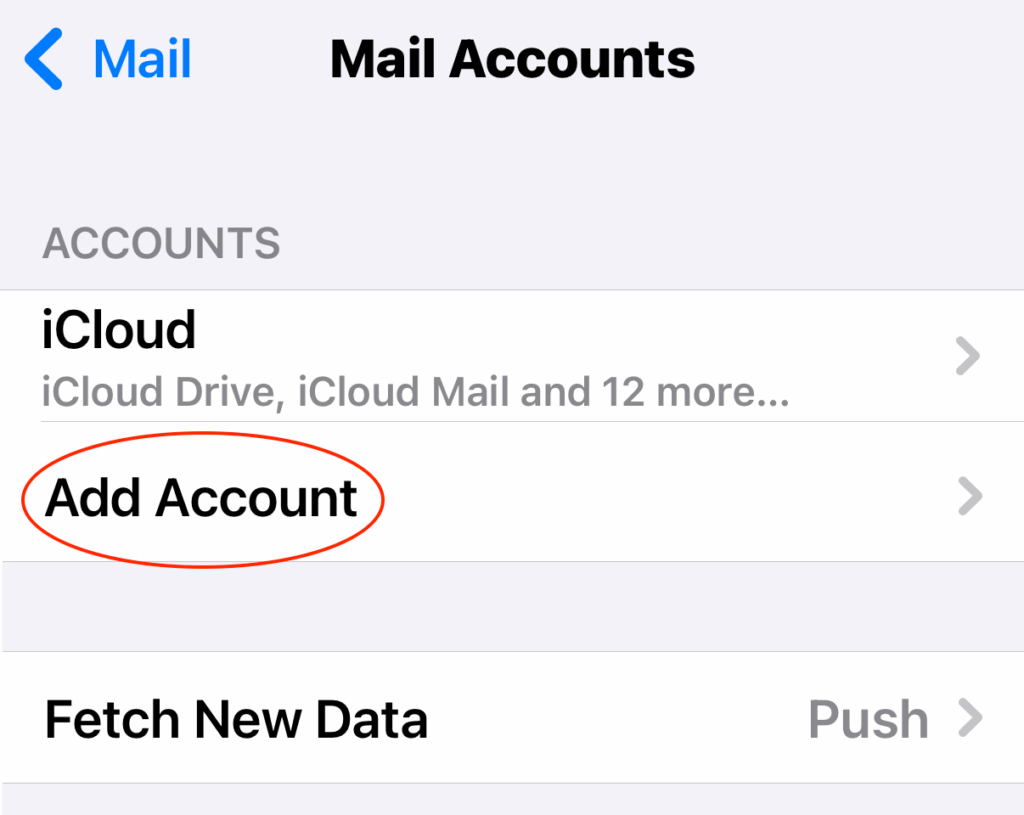
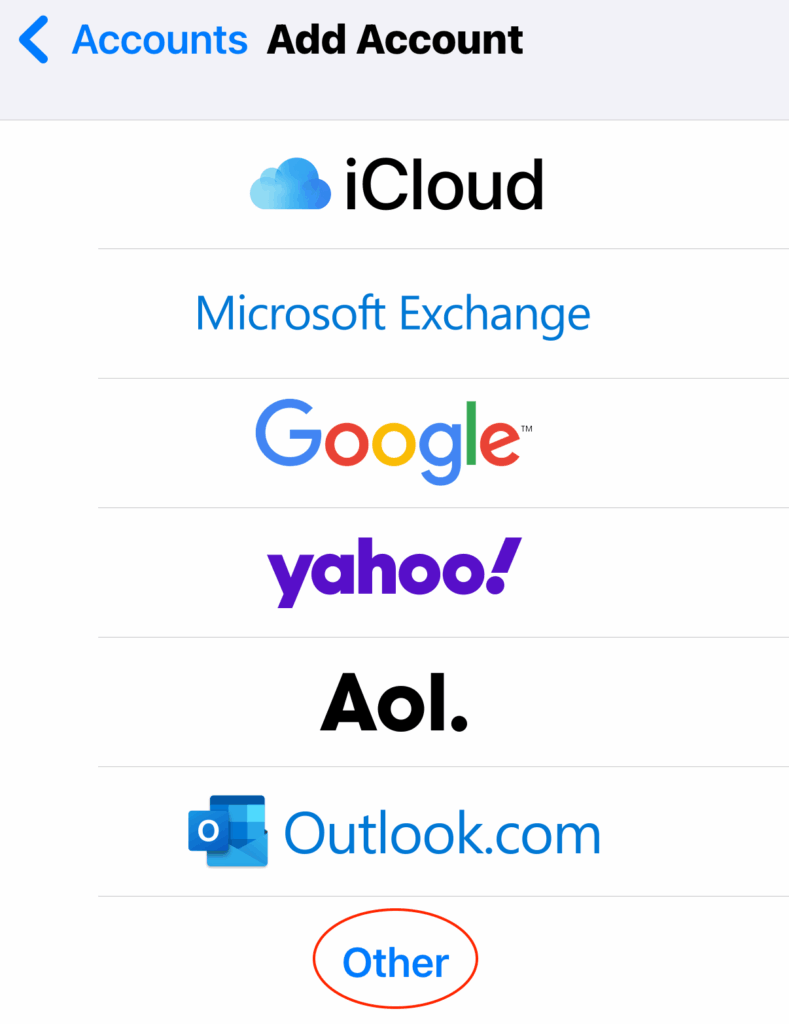
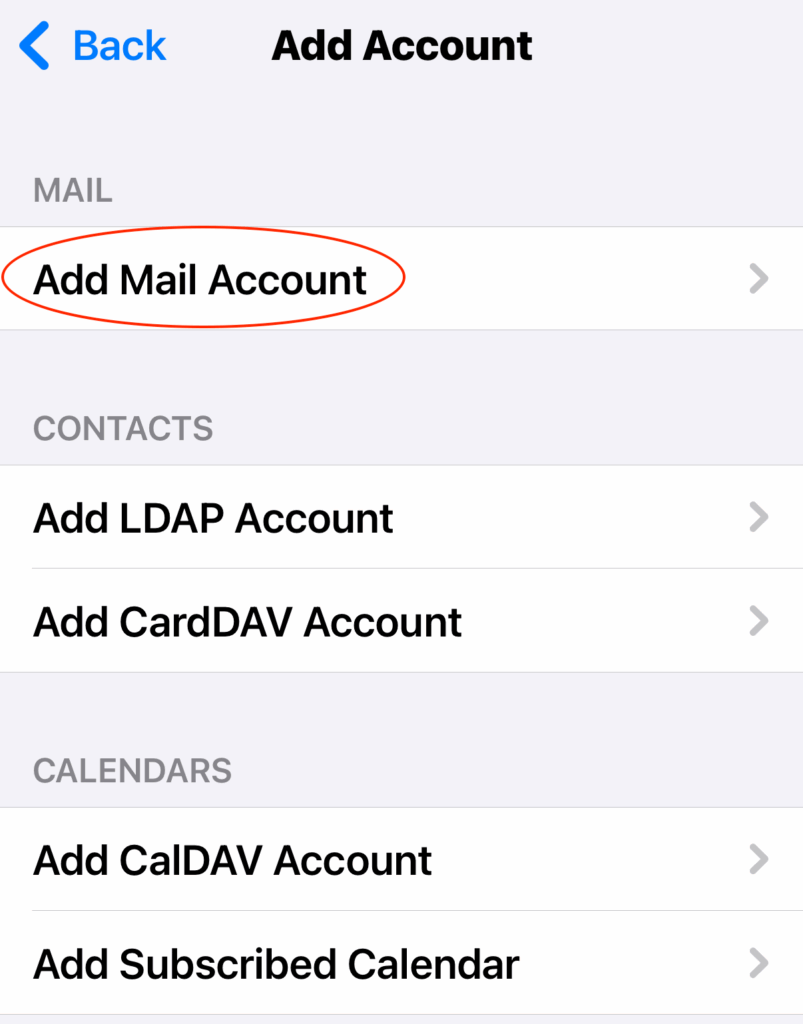
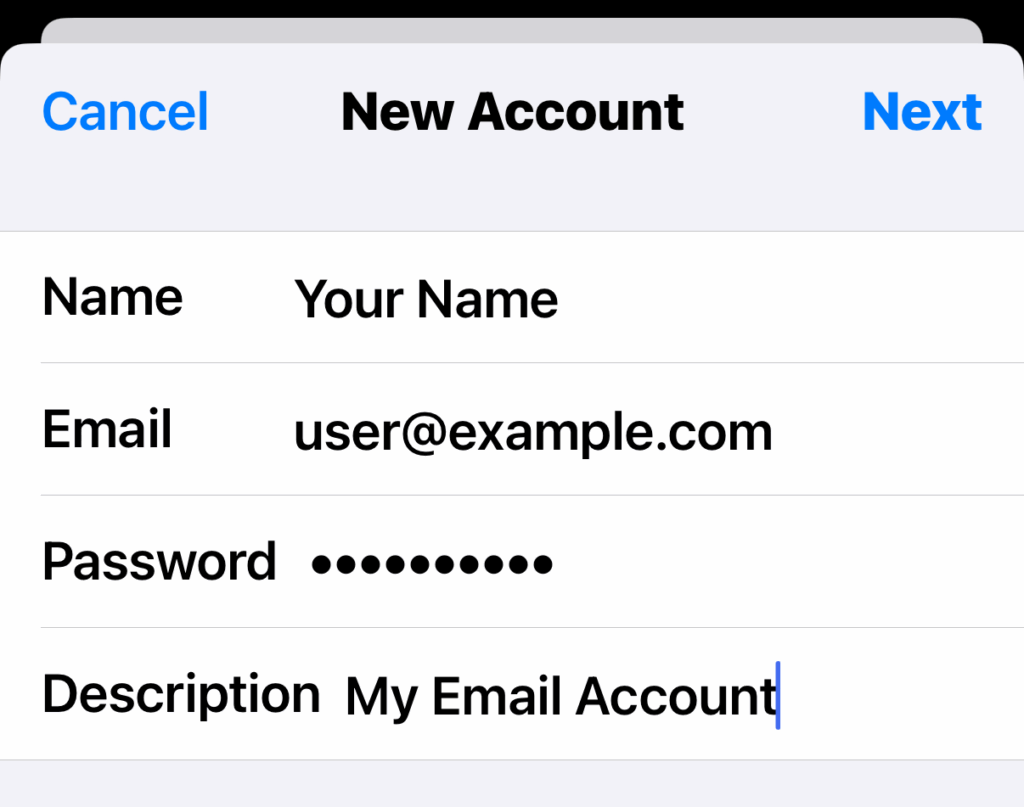
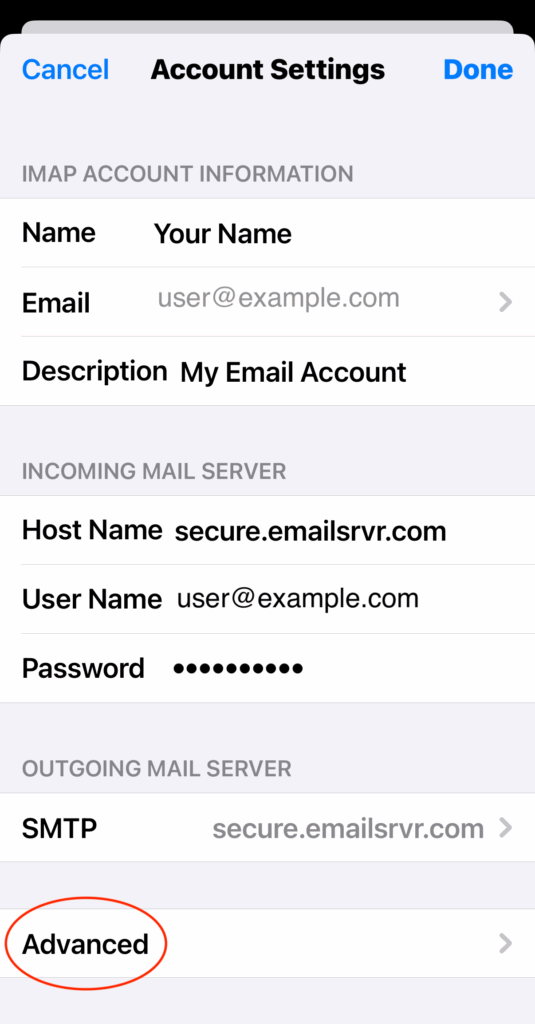
- Name — Enter your first and last name
- Email — Enter your email address
- Password — Enter your account password
- Description — Enter anything you would like so you can identify this account if you have more than one
and then select Next
8. On the next page, you will need to enter more details for your account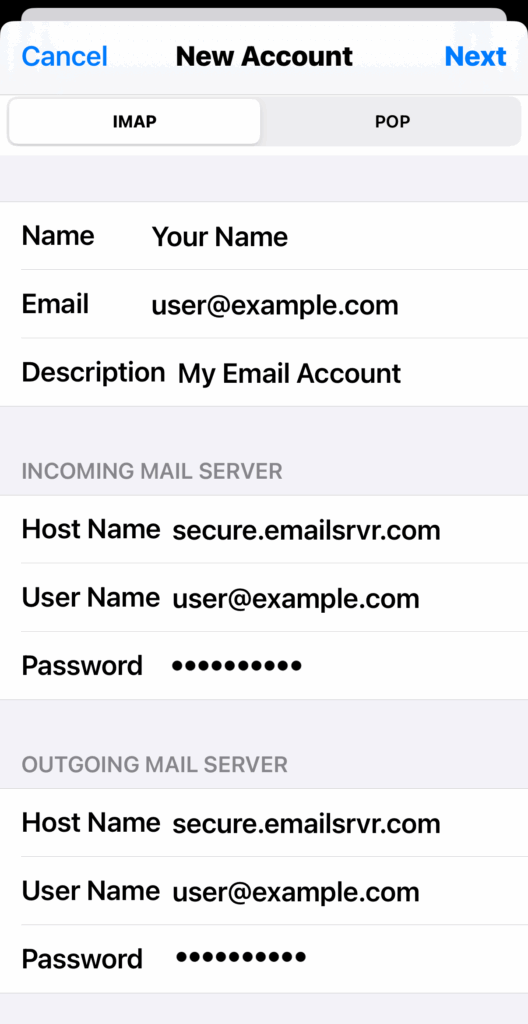
- IMAP — At the top, make sure IMAP is selected
- Name — Should already be set from previous step
- Email — Should already be set from previous step
- Description — Should already be set from previous step
- Incoming Mail Server section:
- Host Name — Enter secure.emailsrvr.com
- User Name — Enter your email address
- Password — Should already be set from earlier
- Outgoing Mail Server section:
- Host Name — Enter secure.emailsrvr.com
- User Name — Enter your email address
- Password — Enter the same account password as before
Once this information is entered you should press the Next button
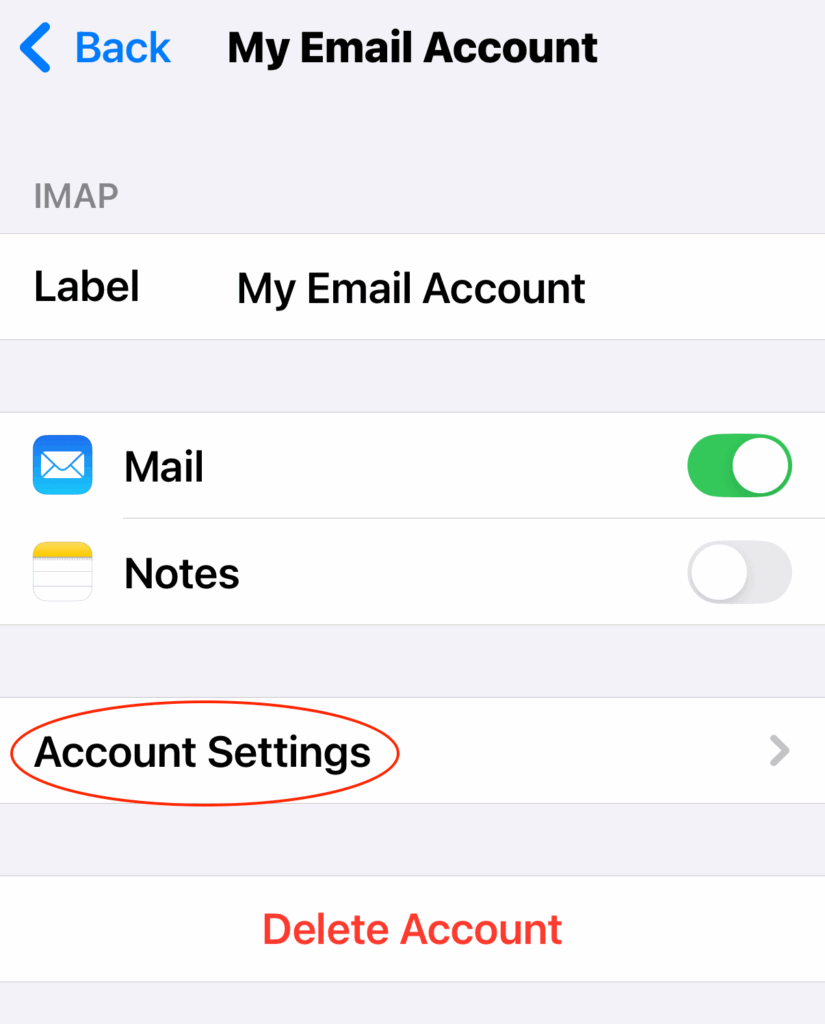
9. Make sure Mail option is enabled, and unselect the Notes option unless needed, and press Save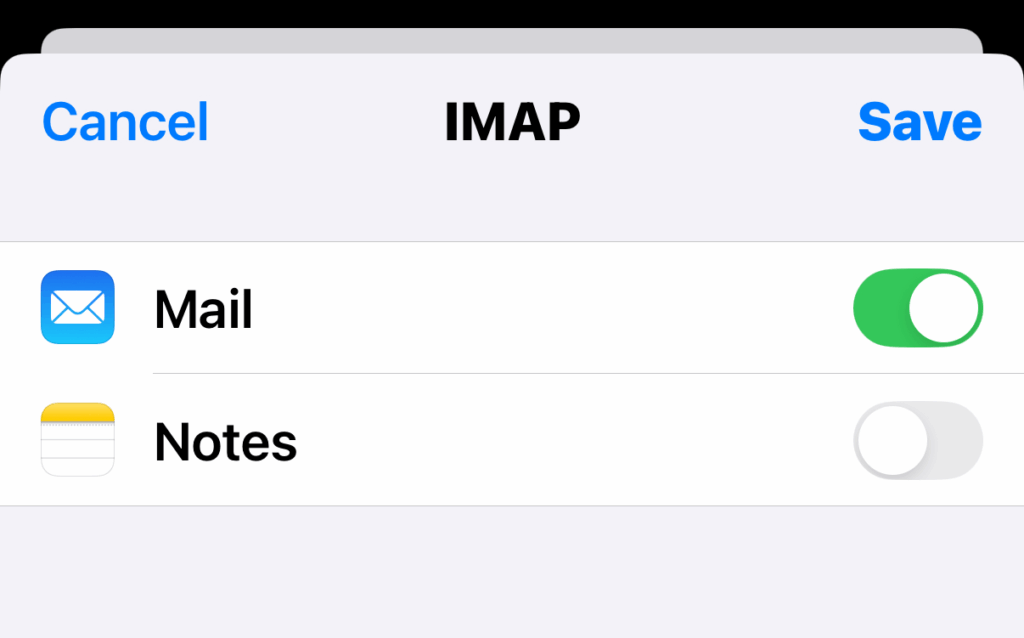
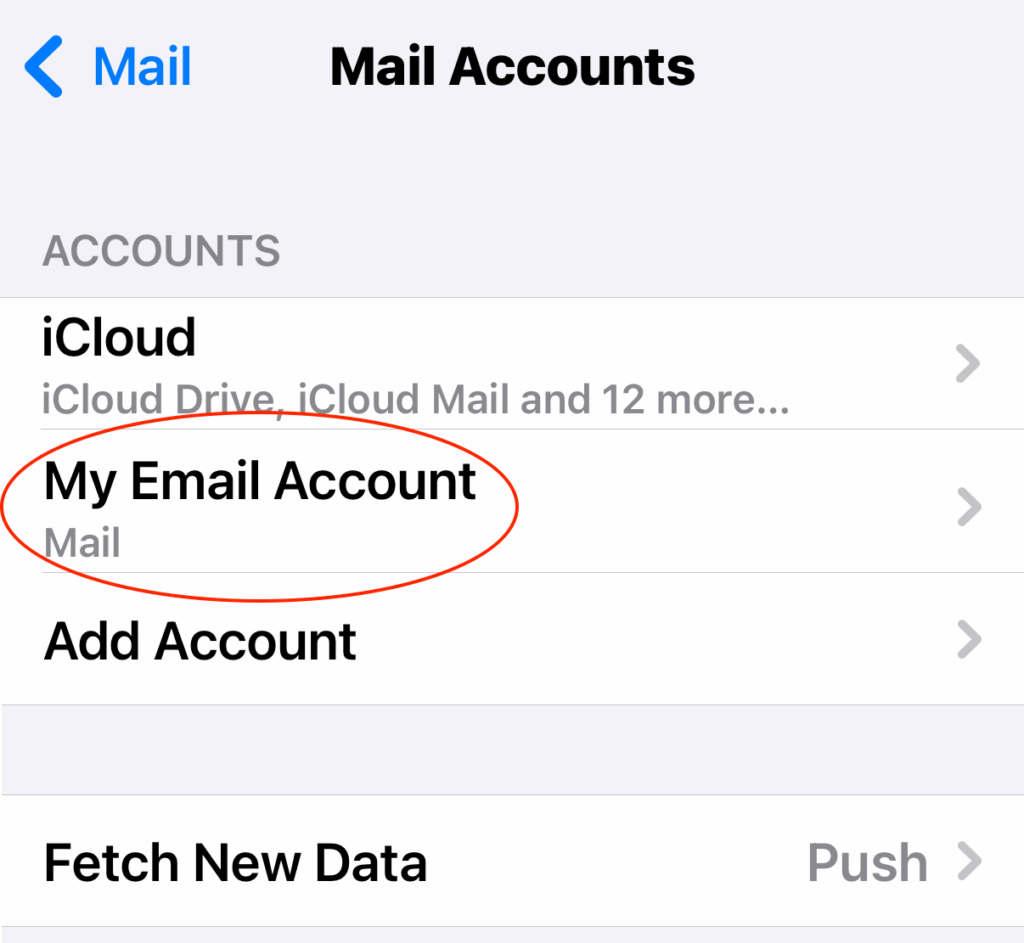
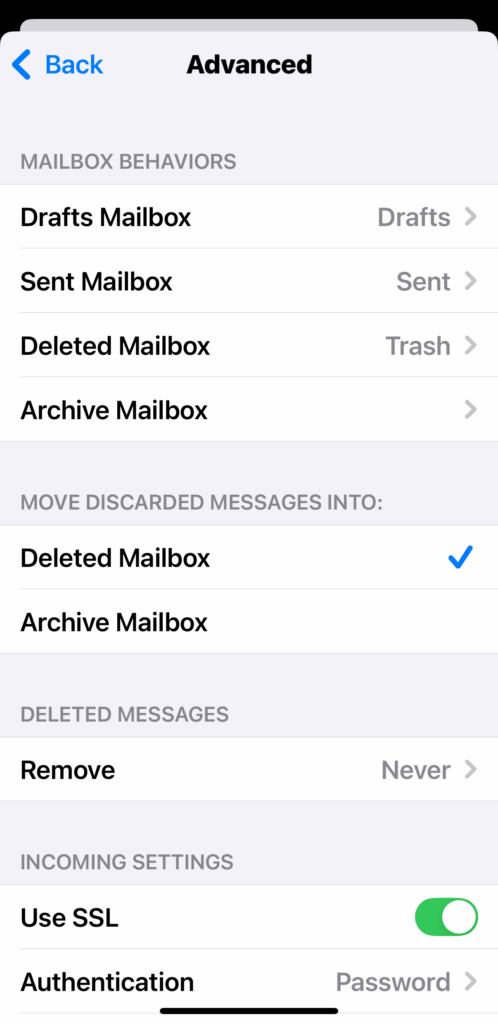
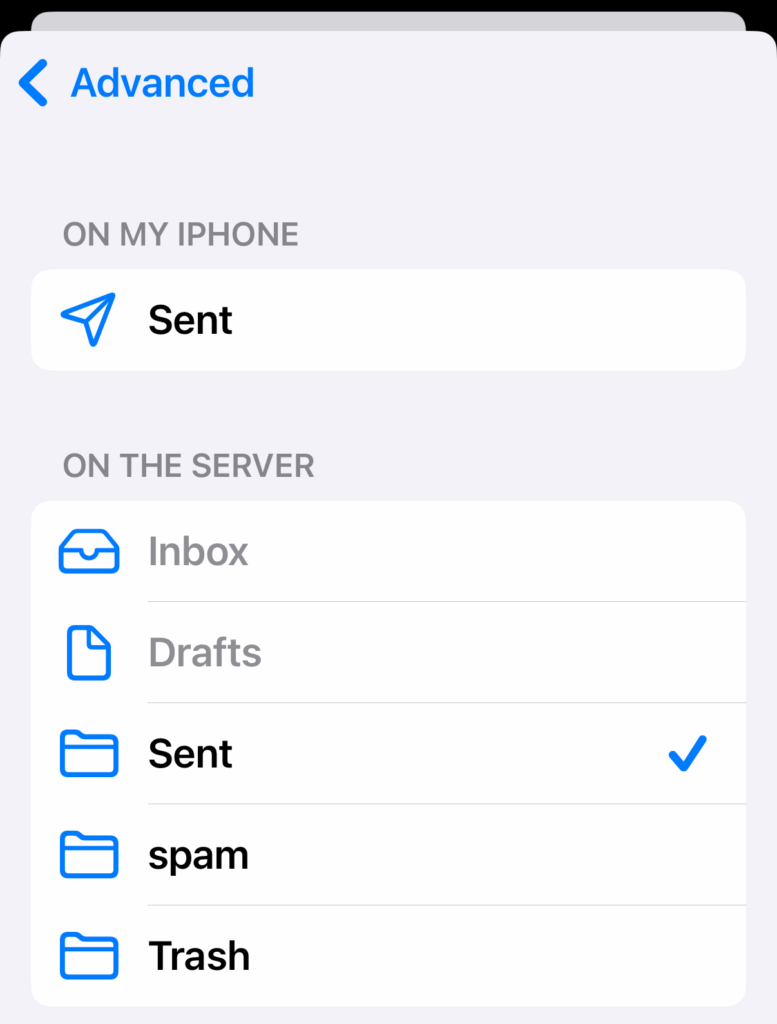
- Drafts Mailbox — set it to Drafts in the ON THE SERVER section
- Sent Mailbox — set it to Sent in the ON THE SERVER section
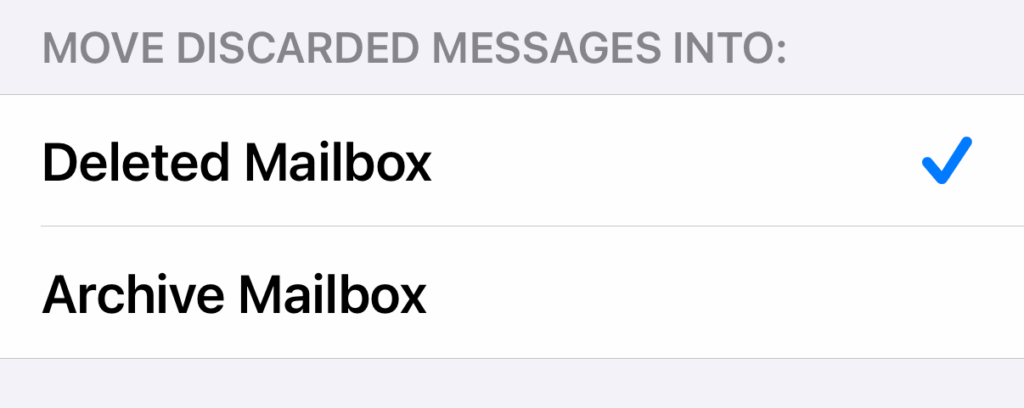
- Deleted Mailbox — set it to Trash in the ON THE SERVER section
- Archive Mailbox — set it to Archive in the ON THE SERVER section
For each folder, when you click on it you will be able to select the correct location…
